AddThis

Thursday, August 29, 2024

A Diet From The American Heart Foundation:


New Study Reveals

The Best Diet for a Healthy Heart


The American Heart Association recommends a healthy eating pattern that emphasizes vegetables, fruits and whole grains. It includes skinless poultry, fish and legumes (beans, peas and lentils); nontropical vegetable oils; and nuts and seeds. Limit your intake of sodium, sweets, sugar sweetened beverages and red and processed meats. Everything you eat and drink is part of your diet pattern. Make healthy choices today and they’ll add up to healthier tomorrows for you! 


A Diet From The American Heart Foundation

Lose up to 10 Pounds in 3 Days! 

 FIRST DAY : Breakfast: Black coffee or tea, 1/2 grapefruit, 1 slice toast, 2 tablespoons peanut butter. 

 Lunch: ½ cup tuna, 1 slice toast, black coffee or tea. 

 Dinner: 2 slices of any type of meat (about 3 ounces), 1 cup string beans, 1 cup beets,  1 small apple, 1 cup vanilla ice cream.  

SECOND DAY  Breakfast: 1 egg, ½ banana, 1 slice toast, black coffee or tea.

Lunch: 1 cup cottage cheese, 5 saltine crackers.  

Dinner: 2 hot dogs, 1 cup broccoli, ½ cup carrots, ½ banana, ½ cup vanilla ice cream.

THIRD DAY  Breakfast: 5 saltine crackers, 1 slice cheddar cheese, 1 small apple, black coffee or tea.

Lunch: 1 hard-boiled egg, 1 slice toast 

Dinner: 1 cup tuna, 1 cup beets, 1 cup cauliflower, ½ cantaloupe, ½ cup vanilla ice cream.

Diet plan works on chemical breakdown and it is proven.  Do not vary or substitute any of the above foods.  Salt and pepper may be used – no other seasonings.  Where no quantity is given, there are no restrictions other than common sense.  

This diet is to be used only 3 days at a time.  In 3 days you will lose up to 10 pounds.  After 3 days of dieting you can eat normal food, but do not overdo it!  After your 4 days of normal eating – start back on your 3-day diet plan.  You can lose up to forty (40) pounds in a 4-week period – if you stick to it… 

This is a safe diet.  REMEMBER – DO NOT SNACK BETWEEN MEALS!! YOU ARE ALLOWED DIET SODA AND AS MUCH WATER AS YOU WANT


Wednesday, July 3, 2024

Chakra Balancing Meditation: Aligning Your Energy Centers


In the ancient practice of meditation and holistic healing, the concept of chakras holds great significance. Chakras are believed to be the energy centers within our bodies that correspond to different aspects of our physical and emotional well-being. There are seven main chakras located along the spine, from the base to the crown of the head, each representing a unique aspect of our being.


Chakra balancing meditation is a powerful technique that involves focusing on and aligning these energy centers to promote health, emotional balance, and spiritual growth. By working with the chakras through meditation, one can clear blockages, release stagnant energy, and enhance the flow of vital energy throughout the body.


The first step in chakra balancing meditation is to become aware of the seven main chakras and their corresponding colors, locations, and qualities:


1. Root Chakra (Muladhara) - Located at the base of the spine, this chakra represents grounding, stability, and security. Its color is red.


2. Sacral Chakra (Svadhisthana) - Located in the lower abdomen, this chakra governs creativity, passion, and pleasure. Its color is orange.


3. Solar Plexus Chakra (Manipura) - Located in the upper abdomen, this chakra is associated with personal power, confidence, and willpower. Its color is yellow.


4. Heart Chakra (Anahata) - Located in the center of the chest, this chakra represents love, compassion, and emotional balance. Its color is green.


5. Throat Chakra (Vishuddha) - Located at the throat, this chakra governs communication, self-expression, and truth. Its color is blue.


6. Third Eye Chakra (Ajna) - Located in the forehead between the eyebrows, this chakra is associated with intuition, insight, and spiritual awareness. Its color is indigo.


7. Crown Chakra (Sahasrara) - Located at the top of the head, this chakra connects us to the divine and represents enlightenment and spiritual connection. Its color is violet.


To begin chakra balancing meditation, find a quiet and comfortable place to sit or lie down. Close your eyes and focus on your breath, allowing yourself to relax and become present in the moment. Visualize each chakra in turn, starting from the base and moving up to the crown, and imagine each one glowing brightly in its corresponding color.


As you focus on each chakra, take a few deep breaths and imagine the energy flowing freely through that energy center. If you notice any areas of tension or blockages, visualize them melting away and the energy flowing smoothly once again. You may also choose to use affirmations or mantras associated with each chakra to further enhance the balancing process.


With consistent practice, chakra balancing meditation can help you align your energy centers, restore balance to your mind and body, and enhance your overall well-being. By working with the chakras and cultivating a deeper connection to your inner energy, you can experience greater harmony, vitality, and spiritual growth in your life.


In conclusion, chakra balancing meditation is a powerful tool for aligning your energy centers and promoting holistic well-being. By incorporating this practice into your daily routine, you can enhance your physical, emotional, and spiritual health and experience a deeper sense of balance and harmony in all aspects of your life. Take the time to tune into your chakras, connect with your inner energy, and embrace the transformative power of chakra balancing meditation.

Thursday, May 23, 2024

Transcendental Meditation


Transcendental Meditation (TM) is a widely practiced form of meditation that aims to help you reach higher states of consciousness and deeper levels of awareness. TM has gained popularity in modern times due to its simplicity and effectiveness in promoting relaxation, mental clarity, and overall well-being.

At the heart of Transcendental Meditation is the practice of silently repeating a mantra, a specific word or phrase, to help focus the mind and achieve a state of deep relaxation. This repetition of the mantra allows the individual to transcend ordinary thinking and enter a state of pure awareness, where the mind is free from distractions and stress. 

One of the key principles of Transcendental Meditation is the belief that each individual has a unique inner essence or consciousness that can be accessed through regular practice. By quieting the mind and diving deep within oneself, practitioners of TM can tap into this inner reservoir of creativity, intuition, and wisdom.

Through consistent practice of Transcendental Meditation, individuals have reported a wide range of benefits, including reduced stress and anxiety, improved cognitive function, enhanced emotional well-being, and increased creativity. Many practitioners also claim to experience a greater sense of connection to themselves, to others, and to the world around them.

Research has shown that Transcendental Meditation can have a measurable impact on brain function, with studies demonstrating changes in brainwave patterns, increased gray matter density, and improved connectivity between different regions of the brain. These neurological changes are believed to be linked to the various cognitive and emotional benefits associated with TM.

In addition to the individual benefits of Transcendental Meditation, there is also a growing body of research suggesting that group practice of TM can have a positive impact on society as a whole. By promoting peace, harmony, and social cohesion, group meditation has the potential to create a ripple effect of positivity that extends far beyond the individual practitioner.

In conclusion, Transcendental Meditation offers a potent tool for individuals seeking to explore higher states of consciousness and unlock their full potential. By incorporating this ancient practice into their daily routine, individuals can cultivate a deeper sense of self-awareness, inner peace, and overall well-being. Whether practiced alone or in a group setting, Transcendental Meditation has the power to transform lives and create a more harmonious world for all.

Monday, April 22, 2024

Boost Your Eye Health Naturally: Foods Rich in Lutein and Zeaxanthin, Herbs for Optimal Vision, and Eye Exercises to Improve Eyesight


In today's digital age where screens are a constant presence in our lives, it's more important than ever to take care of our eye health. While regular eye check-ups and wearing protective eyewear are essential, incorporating certain foods, herbs, and eye exercises into your routine can also help maintain optimal vision. In this article, we'll explore how foods rich in lutein and zeaxanthin, specific herbs, and eye exercises can all contribute to improved eye health.


Foods Rich in Lutein and Zeaxanthin:

Lutein and zeaxanthin are antioxidants that are known to support eye health by protecting the eyes from harmful blue light and reducing the risk of age-related macular degeneration. Incorporating foods rich in these nutrients into your diet can help maintain healthy vision. Some foods high in lutein and zeaxanthin include:


1. Leafy Greens: Spinach, kale, and collard greens are excellent sources of lutein and zeaxanthin.


2. Eggs: Egg yolks contain significant amounts of lutein and zeaxanthin, making them a valuable addition to your diet.


3. Corn: Yellow corn is a good source of both lutein and zeaxanthin.


4. Bell Peppers: Red and orange bell peppers contain high levels of these antioxidants.


Herbs for Optimal Vision:

In addition to incorporating lutein and zeaxanthin-rich foods into your diet, certain herbs can also support eye health. Some herbs that are known to promote optimal vision include:


1. Bilberry: Rich in antioxidants and anthocyanins, bilberry can help improve night vision and protect the eyes from damage.


2. Ginkgo Biloba: Known for its circulation-enhancing properties, ginkgo biloba can support healthy blood flow to the eyes and improve vision.


3. Eyebright: This herb has been traditionally used to relieve eye strain and improve overall eye health.


Eye Exercises to Improve Eyesight:

Incorporating regular eye exercises into your daily routine can help strengthen eye muscles, reduce eye strain, and improve overall eyesight. Some effective eye exercises include:


1. Palming: Rub your hands together to generate heat, then cup them over your closed eyes without putting pressure. Take deep breaths and relax for a few minutes.


2. Eye Rolling: Look up and slowly circle your eyes in a clockwise and then counterclockwise direction. Repeat several times.


3. Focus Shifting: Hold a pen at arm's length and slowly bring it towards your nose, focusing on it the whole time. Then, slowly move it back out to arm's length. Repeat several times.


By incorporating foods rich in lutein and zeaxanthin, specific herbs, and regular eye exercises into your daily routine, you can support and improve your eye health naturally. Remember to consult with a healthcare provider before making any significant changes to your diet or lifestyle, especially if you have existing eye conditions.

Monday, March 25, 2024

5 Herbal Teas That Boost The Immune System


In today's fast-paced world, maintaining a strong immune system is more important than ever. While a healthy diet and regular exercise are key components of overall wellness, including herbal teas into your daily routine can provide an extra boost to your immune system. Here are five herbal teas that are known for their immune-boosting properties:

1. Cinnamon Tea:

Cinnamon is not only a popular spice used in cooking, but it also has powerful antioxidant and anti-inflammatory properties. Cinnamon tea can help reduce inflammation in the body and fight off harmful free radicals. Additionally, cinnamon is known to support healthy blood sugar levels, which can contribute to overall immune health.

2. Ginger Tea:

Ginger has been used for centuries in traditional medicine for its immune-boosting properties. Ginger tea is a great way to incorporate this powerful root into your daily routine. Ginger contains compounds that have antimicrobial and anti-inflammatory effects, making it an excellent choice for supporting a healthy immune system.

3. Ginseng Tea:

Ginseng is a popular herb in traditional Chinese medicine known for its immune-boosting properties. Ginseng tea is rich in antioxidants and can help enhance the body's natural defense mechanisms. Regular consumption of ginseng tea may help improve immune function and increase resistance to infections.

4. Cayenne Pepper Tea:

Cayenne pepper is not only a spicy addition to your meals but also a potent immune booster. Cayenne pepper contains capsaicin, a compound that has anti-inflammatory and antimicrobial properties. Cayenne pepper tea can help improve circulation and support the body's immune response to infections.

5. Mint Tea:

Mint tea is not only refreshing but also beneficial for the immune system. Mint leaves contain menthol, which has antimicrobial properties that can help fight off bacteria and viruses. Additionally, mint tea can help soothe the digestive system and reduce inflammation, which can indirectly support immune function.

Incorporating these five herbal teas into your daily routine can provide a natural and delicious way to boost your immune system. Whether you prefer the spicy kick of cayenne pepper tea or the soothing taste of mint tea, there is a herbal tea option for everyone looking to support their overall health and well-being.

Wednesday, March 20, 2024

The Health Benefits of Herbal Teas


Herbal teas have been enjoyed for centuries for their delicious flavors and numerous health benefits. Made from a variety of plants, herbs, and spices, these teas are not only soothing and refreshing but also offer a range of medicinal properties that can promote overall well-being. 

From aiding digestion to boosting immunity, herbal teas are a natural and effective way to support your health. Some of the key benefits of incorporating herbal teas into your daily routine.

1. Digestive Health: Many herbal teas, such as peppermint, ginger, and chamomile, are known for their digestive properties. Peppermint tea can help relieve bloating and indigestion.

Ginger tea is excellent for calming an upset stomach. Chamomile tea is often used to alleviate symptoms of irritable bowel syndrome (IBS) and promote healthy digestion.

2. Stress Relief: Herbal teas are a popular choice for relaxation and stress relief. Chamomile tea, in particular, is well-known for its calming effects and can help reduce anxiety and promote better sleep.

Lavender Lotea is another excellent option for relaxation and can help soothe the mind and body after a long day.

3. Immune Support: Herbal teas are rich in antioxidants and other beneficial compounds that can help boost the immune system. Echinacea tea, for example, is often used to prevent and treat colds and flu due to its immune-boosting properties. 

Elderberry tea is another popular choice for immune support and can help reduce the duration and severity of cold and flu symptoms.

4. Weight Management: Some herbal teas, such as green tea and dandelion tea, are believed to aid in weight management. 

Green tea is known for its metabolism-boosting properties, while dandelion tea can help support healthy digestion and detoxification, which are important factors in maintaining a healthy weight.

5. Anti-Inflammatory Effects: Many herbal teas have anti-inflammatory properties that can help reduce inflammation in the body. 

Turmeric tea, for example, is a powerful anti-inflammatory drink that can help alleviate symptoms of arthritis and other inflammatory conditions. Ginger tea is also known for its anti-inflammatory effects and can help reduce pain and swelling.

6. Skin Health: Herbal teas can also benefit the skin when consumed regularly. Rooibos tea, in particular, is rich in antioxidants that can help protect the skin from damage caused by free radicals. 

Nettle tea is another herbal remedy that has been used for centuries to promote health and well-being. Made from the leaves of the stinging nettle plant, this tea is known for its numerous health benefits.

Nettle tea is rich in vitamins, minerals, and antioxidants, making it a great choice for boosting the immune system and fighting off illness. It is also believed to have anti-inflammatory properties, which can help reduce pain and swelling in the body. 

Additionally, nettle tea is often used to support healthy skin, hair, and nails, making it a popular choice for those looking to improve their overall appearance. Whether enjoyed hot or cold, nettle tea is a delicious and nutritious beverage that can be enjoyed at any time of the day.

Does Herbal Tea Aid Weight Loss

Tuesday, March 12, 2024

How To Grow Your Own Mulberries in a Container


It can be a fun and rewarding way to enjoy this tasty and nutritious fruit right at home. Mulberries are small to medium-sized trees that can thrive in containers, making them a great option for those who have limited space or live in urban areas. By following a few simple steps, you can successfully grow mulberries in a container and enjoy a bountiful harvest of these delicious berries.

Choose the Right Container: 

Select a large container that is at least 24 inches in diameter and has drainage holes at the bottom to allow excess water to escape. Mulberries have a deep root system, so choose a container that is deep enough to accommodate their roots.

Use Well-Draining Soil: 

Mulberries prefer well-draining soil that is rich in organic matter. A mix of potting soil, compost, and perlite or sand can provide the ideal growing medium for your mulberry tree.

Select the Right Variety: 

There are different varieties of mulberries, including dwarf and bush varieties that are well-suited for container growing. Make sure to choose a variety that is best suited for your growing conditions and space limitations.

Provide Adequate Sunlight: 

Mulberries thrive in full sun, so place your container in a location that receives at least 6-8 hours of sunlight per day. If growing indoors, place your mulberry tree near a south-facing window where it can receive ample sunlight.

Water and Fertilize Regularly: 

Keep the soil consistently moist but not waterlogged. Water your mulberry tree regularly, especially during hot and dry periods. Fertilize your mulberry tree with a balanced fertilizer every 4-6 weeks during the growing season to promote healthy growth and fruit production.

Prune and Train Your Tree: 

Mulberries can be pruned to maintain a compact size and shape in a container. Regular pruning can also help improve air circulation and fruit production. Train your mulberry tree to a central leader or an open-center shape to encourage healthy growth and fruiting.

Harvest Your Mulberries: 

Mulberries are ready for harvest when they are fully ripe and in color. Gently pluck the berries from the tree when they are ready, being careful not to damage the fruit or the tree.

By following these steps, you can successfully grow mulberries in a container and enjoy a bountiful harvest of these delicious and nutritious berries. With a little care and attention, you can enjoy the fresh taste of mulberries right at home, whether you have a large garden or a small balcony. lberries are small, sweet, and juicy fruits that are as delicious as they are nutritious. These berries have been prized for their health benefits for centuries and are often used in traditional Chinese medicine. One of the key components that make mulberries so beneficial is their high content of resveratrol, a natural compound with powerful antioxidant properties.

Resveratrol is a polyphenol compound found in certain plants, including grapes, blueberries, and, of course, mulberries. Research has shown that resveratrol has numerous health benefits, including potentially reducing the risk of heart disease and cancer, protecting against aging-related diseases, and improving overall health and well-being. In mulberries, the presence of resveratrol further enhances their already impressive nutritional profile.

In Chinese medicine, mulberries have been used for centuries to treat a variety of health issues, including high blood pressure, diabetes, and inflammation. The berries are believed to have cooling properties, making them a popular remedy for ailments related to heat and excess energy in the body. Mulberries are also said to support liver and kidney health and aid in digestion.

Research and studies on mulberries are ongoing, with many conducted in countries like China and Japan where these berries have a long history of use. These studies have shown promising results in terms of the health benefits of mulberries, particularly in relation to their antioxidant and anti-inflammatory properties. Some research suggests that mulberries may help reduce inflammation, lower cholesterol levels, and regulate blood sugar levels, making them a valuable addition to a healthy diet.

In conclusion, mulberries are a delicious and nutritious fruit with a wide range of health benefits. From their high content of resveratrol to their long history of use in traditional Chinese medicine, mulberries have proven themselves to be a valuable addition to a healthy lifestyle. Whether eaten fresh, dried, or in other forms like jams and juices, mulberries are a versatile fruit that can support loverall health and well-being.

"Click on Link To View Video."

Resveratrol Benefits

Wednesday, March 6, 2024

How To Grow Macadamia Nuts

Macadamia nuts are a highly sought-after crop due to their rich, buttery flavor and numerous health benefits. Growing macadamia nut trees can be a profitable venture for small farmers with the right knowledge and care. In this article, we will discuss the process of growing and caring for macadamia nut trees, as well as their earning potential for small-scale farmers.

Growing Macadamia Nut Trees:

1. Site Selection: Macadamia nut trees require a warm, tropical climate with well-drained soil. They do best in areas with temperatures between 50-80 degrees Fahrenheit and plenty of sunlight. Be sure to select a site with good airflow to prevent diseases.

2. Planting: Macadamia trees can be grown from seeds or grafted seedlings. Plant trees at least 15-20 feet apart to allow for proper growth and air circulation. Water regularly, especially during the first few years of growth.

3. Soil Management: Macadamia trees thrive in well-drained, acidic soil with a pH of 5.0-6.5. Regularly test the soil and adjust as needed to ensure good nutrient levels.

4. Pruning and Maintenance: Prune macadamia trees annually to remove dead or diseased branches and promote new growth. Fertilize trees with a balanced fertilizer high in potassium and magnesium to support nut production.

5. Pest and Disease Control: Monitor trees regularly for signs of pests and diseases, such as macadamia felted coccid or phytophthora root rot. Treat infestations promptly to prevent spread and reduce damage to the treesrning Potential for Small Farmers:

Macadamia nuts are a high-value crop that can generate significant income for small-scale farmers. The market for macadamia nuts has been steadily growing due to increasing demand for healthy, plant-based foods. As of 2021, macadamia nuts are one of the most expensive nuts on the market, making them a lucrative crop for farmers.

The time it takes to see the first nuts from macadamia trees can vary depending on factors such as tree age, growing conditions, and variety. In general, macadamia trees take 5-7 years to start producing nuts, with full production reached at around 10 years. However, some varieties may begin producing nuts as early as 4 years.

In conclusion, growing macadamia nut trees can be a profitable venture for small farmers with proper care and management. With the increasing demand for macadamia nuts and their high earning potential, this crop presents an opportunity for small-scale farmers to diversify their income and improve their livelihoods. By following good agricultural practices and investing time and effort into cultivating macadamia nut trees, farmers can reap the benefits of this lucrative crop for years to come.


Health Benefits of Macadamia Nuts

Macadamia nuts are not only delicious and versatile in cooking, but they also offer a wide range of health benefits. These nuts have been praised for their nutritional value and are a great source of vitamins and minerals that contribute to overall well-being. Let's explore some of the health benefits of macadamia nuts and the vitamins and minerals they contain.

Rich in Healthy Fats

One of the key benefits of macadamia nuts is their high content of monounsaturated fats, specifically oleic acid. These healthy fats have been linked to lowering bad cholesterol levels and reducing the risk of heart disease. Consuming macadamia nuts in moderation can contribute to a healthy heart and improved cardiovascular health.

Packed with Antioxidants

Macadamia nuts are a rich source of antioxidants, such as vitamin E, which help protect cells from damage caused by free radicals. Antioxidants play a crucial role in reducing inflammation and the risk of chronic diseases, including cancer and heart disease. Including macadamia nuts in your diet can help boost your antioxidant intake and strengthen your body's defenses.

Source of Essential Minerals

Macadamia nuts are also packed with essential minerals that are important for various bodily functions. These nuts are a good source of manganese, which plays a key role in metabolism and bone health. They also contain magnesium, phosphorus, and iron, which are vital for energy production, bone strength, and oxygen transport in the body.

Vitamins for Overall Health

In addition to minerals, macadamia nuts are a good source of vitamins that support overall health. They are rich in vitamin B1 (thiamine), which helps convert food into energy and supports nerve function. Macadamia nuts also contain vitamin B6, which is important for brain health and the production of neurotransmitters.

In conclusion, macadamia nuts offer a wide range of health benefits due to their nutritional benefits. With a high content of healthy fats, antioxidants, essential minerals, and vitamins, these nuts can contribute to heart health, reduced inflammation, improved energy levels, and overall well-being. Incorporating macadamia nuts into your diet in moderation can be a delicious and nutritious way to support your health.


Sunday, February 4, 2024

Recipe for Canning Lima Beans and Green Beans


During the Second World War, canned vegetables were widely used due to their long shelf life and convenience. Here are ten popular canned vegetables that were commonly used during that time:

1. Canned Green Beans

2. Canned Corn

3. Canned Peas

4. Canned Carrots

5. Canned Spinach

6. Canned Tomatoes

7. Canned Potatoes

8. Canned Beets

9. Canned Lima Beans

10. Canned Mixed Vegetables

These canned vegetables provided essential nutrients and were a valuable food source during the war when fresh produce was scarce or rationed.

Recipe for Canning Lima Beans:

Ingredients:

- Fresh Lima beans

- Water

- Salt (optional)

Instructions:

1. Start by preparing your Lima beans. Shell the beans and discard any damaged or discolored ones.

2. Rinse the beans thoroughly under cold water to remove any dirt.

3. Fill a large pot with water and bring it to a boil.

4. Add the Lima beans to the boiling water and blanch them for 2 minutes.

5. After blanching, immediately transfer the beans to a bowl filled with ice water to stop the cooking process.

6. Drain the beans and pack them tightly into sterilized canning jars, leaving about 1 inch of headspace at the top.

7. If desired, add 1/2 teaspoon of salt to each pint jar (adjust according to taste).

8. Fill the jars with boiling water, leaving 1 inch of headspace.

9. Remove any air bubbles by gently tapping the jars or using a non-metallic utensil.

10. Wipe the jar rims clean, place the lids on top, and screw on the bands until your fingertips are tight.

11. Process the jars in a pressure canner at

10 pounds of pressure for 40 minutes (adjust for altitude if necessary).

12. After processing, carefully remove the jars from the canner and place them on a towel-lined countertop.

13. Allow the jars to cool undisturbed for 12-24 hours.

14. Check the seals by pressing down on the center of each lid. If the lid doesn't flex or make a popping sound, it is sealed.

15. Store the sealed jars in a cool, dark place for up to 1 year.

Recipe for Canning Green Beans:

Ingredients:

- Fresh green beans

- Water

- Salt (optional)

Instructions:

1. Begin by preparing your green beans. Trim the ends and remove any blemished or tough parts.

2. Rinse the beans thoroughly under cold water to remove any dirt.

3. Fill a large pot with water and bring it to a boil.

4. Add the green beans to the boiling water and blanch them for 3 minutes.

5. After blanching, immediately transfer the beans to a bowl filled with ice water to stop the cooking process.

6. Drain the beans and pack them tightly into sterilized canning

Recipe for Canning Green Beans

Ingredients:

- Fresh green beans

- Canning salt

- Water

Equipment:

- Canning jars with lids and bands

- Pressure canner

- Jar lifter

- Canning funnel

- Clean towels

- Cutting board

- Knife

Instructions:

1. Prepare the green beans:

   - Wash the green beans thoroughly under running water.

   - Trim off the ends and remove any blemishes or tough spots.

   - Cut the beans into desired lengths (usually 1-2 inches).

2. Prepare the canning jars:

   - Wash the canning jars, lids, and bands with hot soapy water.

   - Rinse them well and place them in a large pot filled with water.

   - Bring the water to a simmer and let the jars, lids, and bands sit in hot water until ready to use.

3. Prepare the pressure canner:

   - Fill the pressure canner with water according to the manufacturer's instructions.

   - Place the canning rack inside the canner.

   - Heat the water to a simmer.

4. Pack the green beans into jars:

   - Remove a jar from the hot water using a jar lifter.

   - Place a canning funnel on top of the jar.

   - Pack the green beans tightly into the jar, leaving about 1 inch of headspace at the top.

   - Sprinkle 1/2 teaspoon of canning salt over the beans.

5. Fill the jars with boiling water:

   - Pour boiling water over the green beans, leaving 1 inch of headspace.

   - Use a clean towel to wipe the rim of the jar to ensure a good seal.

   - Place a lid on top of the jar and screw on the band until your fingertips are tight.

6. Process the jars in a pressure canner:

   - Place the filled jars into the pressure canner using a jar lifter.

   - Close the lid of the pressure canner and follow the manufacturer's instructions for processing green beans.

   - Process the jars at the recommended pressure and time for your altitude.

7. Remove the jars and cool:

   - Once the processing time is complete, turn off the heat and let the pressure canner cool down naturally.

   - Once the pressure has completely released, carefully remove the jars using a jar lifter.

   - Place the jars on a clean towel and let them cool

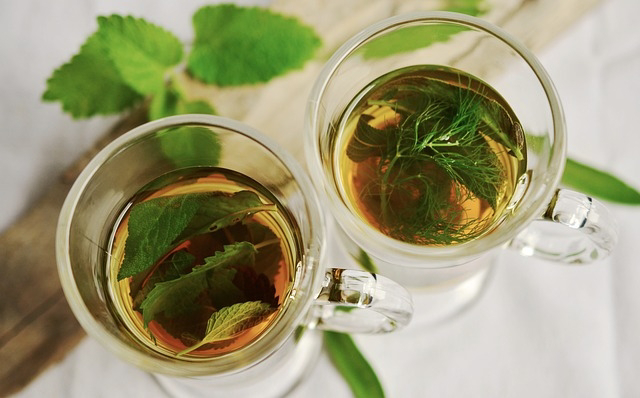
How To Detox With Juicing


Canning: A Lifesaving Skill in Times of War and Political Unrest


In times of war or political unrest, the disruption of normal life can lead to scarcity of food and essential supplies. During such challenging periods, having the knowledge and ability to can food becomes invaluable. 

Canning is a time-tested preservation method that allows individuals and communities to store food for extended periods, ensuring sustenance and survival when access to fresh produce is limited. In this article, we will provide a step-by-step guide to help you get started.

1. Ensuring Food Security:

When war or political unrest disrupts the normal supply chains, access to fresh food becomes uncertain. Canning offers a solution by allowing individuals to preserve surplus produce during times of abundance. By canning fruits, vegetables, and even meats, you can create a stockpile of nutritious food that can sustain you and your family during periods of scarcity.

2. Preserving Nutritional Value:

Canning is an excellent method for preserving the nutritional value of food. By sealing food in airtight containers, you can prevent the growth of bacteria, molds, and other microorganisms that cause spoilage. This preservation technique helps retain essential vitamins, minerals, and antioxidants, ensuring that your canned food remains nutritious even after months or years of storage.

3. Long-Term Storage:

One of the significant advantages of canning is its ability to provide long-term storage. Properly canned food can last for several years, making it an ideal solution for uncertain times. By following the correct canning procedures and using appropriate equipment, you can create a reliable food reserve that will sustain you through extended periods of crisis.

4. Getting Started with Canning:

Here is a step-by-step guide to help you get started with canning:

a. Gather the necessary equipment: You will need canning jars, lids, bands, a canning pot, a jar lifter, a canning funnel, and a timer.

b. Select fresh produce: Choose high-quality fruits, vegetables, or meats for canning. Ensure they are ripe, free from blemishes, and thoroughly washed.

c. Prepare the food: Peel, chop, or slice the produce as required. Follow specific recipes or guidelines for each type of food to ensure proper preparation.

d. Sterilize the jars: Place the jars in boiling water for a few minutes to sterilize them. Remove them carefully

To sterilize the canning jars, follow these steps:

1. Start by washing the jars, lids, and bands in hot, soapy water. Rinse them thoroughly to remove any soap residue.

2. Place the jars upright in a large pot or canner. Make sure there is enough water to cover the jars completely.

3. Bring the water to a boil and let it boil for 10 minutes to sterilize the jars. This will kill any bacteria or microorganisms that may be present.

4. In the meantime, place the lids and bands in a separate small pot and cover them with water. Bring the water to a simmer, but do not boil. Let them simmer for about 5 minutes to sterilize them.

5. After the jars have boiled for 10 minutes, carefully remove them from the pot using jar tongs or a jar lifter. Place them on a clean towel or a wire rack to cool slightly.

6. While the jars are still hot, fill them with your desired food or ingredients, leaving the recommended headspace at the top. Wipe the rims of the jars with a clean, damp cloth to remove any food particles or residue.

7. Using a magnetic lid lifter or tongs, remove the lids and bands from the simmering water. Place a lid on each jar, ensuring it is centered and flat on the rim. Then, screw the bands on until they are fingertip tight.

8. Once all the jars are filled and sealed, return them to the canner or large pot of boiling water. Make sure the water covers the jars by at least 1 inch.

9. Process the jars in boiling water for the recommended time according to the specific recipe you are using. This processing time will vary depending on the type of food being canned.

10. After the processing time is complete, carefully remove the jars from the canner using jar tongs or a jar lifter. Place them on a clean towel or wire rack to cool completely.

11. As the jars cool, you may hear a popping sound, indicating that the lids have sealed properly. Allow the jars to sit undisturbed for 12 to 24 hours to ensure a proper seal.

12. After the jars have cooled, check the seals by pressing down on the center of each lid. If the lid does not flex or pop back, it is sealed. If it does flex or make a popping sound, the jar did not seal properly.


Sunday, January 14, 2024

Anti Aging Look and Feel YoungJonger


The Health Benefits of Raisins: A Natural Powerhouse

Packed with essential nutrients, raisins offer numerous health benefits, including anti-aging properties. Incorporating raisins into your daily diet can be a simple and effective way to boost your overall well-being. The health benefits of raisins are numerous, they have anti-aging benefits, and how you can easily incorporate them into your breakfast  and lunch routines.

Anti aging. Raisins Contain Resveratrol.

Enjoy Your Retirement

Raisins are rich in fiber, vitamins, and minerals. They are a great source of natural sugars, making them an excellent energy booster. Additionally, raisins contain iron, potassium, calcium, and magnesium, which are essential for maintaining healthy bones and muscles. They also provide antioxidants that help protect the body against free radicals, reducing the risk of chronic diseases.

2. Anti-Aging Benefits:

Raisins are known for their anti-aging properties. They contain polyphenols, which are powerful antioxidants that help fight oxidative stress and inflammation in the body. These antioxidants can help slow down the aging process by reducing the damage caused by free radicals. Regular consumption of raisins can promote healthy skin, reduce wrinkles, and improve overall skin elasticity.

3. Daily Consumption:

Incorporating raisins into your daily routine is simple and convenient. You can enjoy a handful of raisins as a stand alone snack or add them to various dishes. The recommended daily intake of raisins is around 1.5 ounces (about 40 grams), which is roughly a small handful. This portion size provides a good balance of nutrients without adding excessive calories to your diet.

4. Adding Raisins to Breakfast:

There are several ways to add raisins to your breakfast to kickstart your day with a nutritious boost. You can sprinkle them over your morning cereal or oatmeal, mix them into yogurt or smoothies, or even incorporate them into homemade granola bars. Raisins add a natural sweetness and a chewy texture to your breakfast, making it more enjoyable and satisfying.

5. Incorporating Raisins into Lunch:

Raisins can also be a delightful addition to your lunchtime meals. You can toss them into salads for a burst of flavor and a touch of sweetness. Raisins pair well with leafy greens, nuts, and grains, creating a delicious and nutritious combination. Another option is to use raisins as a topping for sandwiches or wraps. The natural sweetness of raisins can complement savory ingredients like turkey, chicken, or cheese, adding a unique twist to your lunch. Additionally, you can mix raisins with couscous or quinoa to create a satisfying and wholesome side dish. The chewy texture of raisins adds a pleasant contrast to the grains, making your lunch more enjoyable. 

Lastly, you can incorporate raisins into homemade granola bars or energy balls, providing a convenient and healthy snack option for your midday break. With their versatility and nutritional benefits, raisins are a fantastic choice to enhance the flavor and variety of your lunchtime meals.

Thursday, December 28, 2023

5 Incredible Health Benefits of Garlic


Garlic, a versatile and widely used ingredient in culinary dishes, is not only known for its distinct flavor but also for its numerous health benefits. Packed with essential nutrients and medicinal properties. Use

Garlic has been used for centuries to promote overall well-being. In this article, we will explore five incredible health benefits of garlic and provide you with a step-by-step guide on how to grow garlic at home. Whether you are a gardening enthusiast or simply interested in improving your health, read on to discover the wonders of garlic.

1. Boosts Immune System:

Garlic is renowned for its immune-boosting properties. It contains compounds like allicin, which have been shown to enhance the function of the immune system, helping your body fight off infections and diseases. Regular consumption of garlic can reduce the severity and duration of common illnesses such as the flu and colds.

2. Supports Heart Health:

Including garlic in your diet can have a positive impact on your cardiovascular health. Studies have indicated that garlic can help lower blood pressure, reduce cholesterol levels, and prevent the formation of blood clots. These benefits contribute to a healthier heart and a reduced risk of heart disease.

3. Fights Inflammation:

Chronic inflammation is linked to various health issues, including arthritis, diabetes, and certain types of cancer. Garlic contains anti-inflammatory compounds that can help reduce inflammation in the body. By incorporating garlic into your meals, you may experience a decrease in inflammation and associated symptoms.

4. Enhances Digestive Health:

Garlic has been traditionally used to aid digestion and alleviate digestive problems. It stimulates the production of digestive enzymes, promoting better nutrient absorption and reducing the risk of gastrointestinal issues. Additionally, garlic possesses antimicrobial properties that can help combat harmful bacteria in the gut.

5. Supports Bone Health:

Maintaining strong and healthy bones is crucial, especially as we age. Garlic contains nutrients like calcium and vitamin C, which are essential for bone health. Regular consumption of garlic can help prevent bone loss and reduce the risk of conditions such as osteoporosis.


Growing Garlic Indoors in 2-Liter Plastic Containers: A Step-by-Step Guide

Growing garlic indoors is a rewarding and practical way to enjoy this versatile herb year-round. With limited space, you can easily cultivate garlic in 2-liter plastic containers, making it an ideal option for urban gardeners or those with limited outdoor space.

In this article, we will guide you through the process of growing garlic indoors, ensuring a successful harvest of fresh, flavorful bulbs.

Materials Needed:

1. 2-liter plastic containers with drainage holes

2. High-quality potting soil

3. Garlic cloves (preferably organic)

4. Watering can or spray bottle

5. Fertilizer (optional)

6. Labels or markers

Step-by-Step Guide:

1. Selecting Garlic Cloves:

Choose healthy garlic bulbs from a reputable source or your local nursery. Look for large, firm cloves with no signs of damage or disease. Organic garlic cloves are recommended as they are free from chemicals and pesticides.

2. Preparing the Containers:

Clean and sterilize the 2-liter plastic containers to ensure a healthy growing environment for your garlic. Make drainage holes at the bottom of each container to prevent waterlogging.

3. Preparing the Soil:

Fill the containers with high-quality potting soil, leaving about an inch of space at the top. Garlic prefers loose, well-draining soil, so you may consider adding perlite or sand to improve drainage.

4. Planting Garlic Cloves:

Separate the garlic bulbs into individual cloves, ensuring the papery skin remains intact. Plant each clove with the pointed end facing up, about 2 inches deep into the soil. Space the cloves 4-6 inches apart to allow room for growth.

5. Watering:

After planting, water the containers thoroughly until the soil is evenly moist. Avoid overwatering, as garlic prefers slightly dry conditions. Monitor the soil moisture regularly and water only when the top inch of soil feels dry. Use a watering can or spray bottle to avoid disturbing the cloves.

6. Providing Adequate Light:

Place the containers in a sunny location where they can receive at least 6-8 hours of direct sunlight each day. If natural light is limited, you can supplement it with fluorescent grow lights placed 6-8 inches above the plants.

7. Maintaining Temperature and Humidity:

Garlic thrives in cool temperatures between 60-70°F (15-21°C

To Grow Garlic in Water,

Follow these steps:

1. Select healthy garlic cloves: Choose large, firm cloves from a garlic bulb.

2. Prepare a container: Take a glass or a small jar and fill it with water, leaving about an inch of space at the top.

3. Place the cloves: Place the garlic cloves in the container, ensuring that the pointed end faces upward.

4. Maintain water level: Keep the water level consistent, ensuring that the bottom of the cloves is submerged but the tops remain above the water.

5. Provide sunlight: Place the container in a location that receives ample sunlight, preferably near a window.

6. Change water regularly: Change the water every two to three days to prevent stagnation and maintain oxygen supply.

7. Patience and care: Over time, you will notice roots growing from the bottom of the cloves and green shoots emerging from the tops. Be patient and continue to care for the garlic by providing sunlight and changing the water.


Tuesday, December 19, 2023

5 Fruits for Clear and Glowing Skin

5 Fruits for Clear and Glowing Skin

Having healthy and glowing skin is a desire shared by many. While skincare products play a significant role in maintaining skin health, the food we consume also plays a crucial role in achieving a lovely complexion. Fruits, in particular, are packed with essential vitamins, minerals, and antioxidants that can nourish and rejuvenate the skin from within. In this article, we will explore five fruits that can help you achieve a lovely skin naturally.

1. Berries:

Berries, such as strawberries, blueberries, and raspberries, are not only delicious but also excellent for your skin. These fruits are rich in antioxidants, including vitamin C, which helps protect the skin from damage caused by free radicals. Additionally, berries contain high levels of fiber, which aids in digestion and promotes a healthy gut. A healthy gut is essential for clear and radiant skin.

2. Citrus Fruits:

Citrus fruits like oranges, lemons, and grapefruits are packed with vitamin C, which is vital for collagen production. Collagen is a protein that helps maintain the skin's elasticity and firmness. Consuming citrus fruits can help reduce the appearance of wrinkles and fine lines, giving your skin a youthful glow. Moreover, the high water content in these fruits helps keep the skin hydrated and supple.

3. Avocado:

Avocado is a nutrient-dense fruit that is beneficial for both your overall health and skin. It is rich in healthy fats, particularly monounsaturated fats, which help moisturize the skin and prevent dryness. Avocado also contains vitamin E, which acts as an antioxidant and protects the skin from damage caused by environmental factors. Regular consumption of avocado can help improve skin texture and promote a radiant complexion.

4. Papaya:

Papaya is a tropical fruit that is known for its numerous skincare benefits. It contains an enzyme called papain, which has exfoliating properties and helps remove dead skin cells, revealing a brighter complexion. Papaya is also rich in vitamins A, C, and E, which promote collagen production, reduce inflammation, and protect the skin against oxidative stress. Including papaya in your diet can help improve skin tone and reduce the appearance of blemishes.

5. Watermelon:

Watermelon is not only a refreshing summer fruit but also a great choice for achieving healthy skin. It is rich in lycopene, a powerful antioxidant that protects the skin from sun damage.


Friday, December 8, 2023

How to Deal With Loneliness and Loss

How to Deal With Loneliness and Loss


The festival season is often associated with joy, togetherness, and celebration. However, for those who have lost a soul mate or gone through a divorce, this time of year can be difficult. Loneliness may feel more pronounced, and the festivities can serve as a reminder of the void left by the absence of a loved one. If you find yourself in this situation, it's important to remember that you are not alone, and there are ways to deal with this difficult period. Here are some suggestions to help you cope with loneliness during the festival season:

1. Acknowledge your feelings: It's okay to feel sad, lonely, or even angry during this time. Allow yourself to experience these emotions. Recognize that grieving is a natural process, and it takes time to heal.

2. Seek support: Reach out to friends, family, or support groups who can provide a listening ear and understanding. Sharing your feelings with others who have gone through similar experiences can be immensely comforting.

3. Create new traditions: Consider establishing new traditions that honor your loved one's memory or reflect your new chapter in life. This could involve lighting a candle, writing a letter, or engaging in activities that bring you solace and joy.

4. Practice self-care: Take care of yourself physically, emotionally, and mentally. Engage in activities that bring you happiness, such as exercising, reading, painting, or listening to music. Prioritize self-care and make time for activities that nourish your soul.

5. Volunteer or give back: Helping others can be a powerful way to shift your focus from your own pain and loneliness. Consider volunteering at a local charity or participating in community events. Contributing to the well-being of others can bring a sense of fulfillment and purpose.

6. Connect with others: Reach out to friends, neighbors, or colleagues and make plans to spend time together. Attend social events, join clubs, or participate in community activities. Surrounding yourself with supportive and understanding individuals can help alleviate feelings of isolation.

7. If you find that your feelings of loneliness and grief are overwhelming and affecting your daily life, consider seeking professional help. A therapist or counselor can provide guidance and support.

Remember, healing takes time, and it's essential to be patient with yourself. While the journey towards healing can be difficult. There may be ups and downs along the way, so It's essential that you give yourself time to heal and process your emotions. Trust in your ability to heal and have faith that brighter days are ahead.


Wednesday, November 22, 2023

Christmas Pudding and Desert


Recipe for a traditional Christmas dessert: Christmas Pudding.

Ingredients:

- 1 cup raisins

- 1 cup currants

- 1 cup chopped mixed peel

- 1 cup chopped dried apricots

- 1 cup chopped dates

- 1 cup chopped prunes

- 1 cup breadcrumbs

- 1 cup all-purpose flour

- 1 cup shredded suet (or vegetarian suet for a vegetarian version)

- 1 cup brown sugar

- 1 teaspoon ground cinnamon

- 1 teaspoon ground nutmeg

- 1 teaspoon ground ginger

- 1 teaspoon baking powder

- 1/2 cup milk (or non-dairy milk for a dairy-free version)

- 3 large eggs

- Zest and juice of 1 orange

- Zest and juice of 1 lemon

- Brandy or rum for soaking (optional)

Instructions:

1. In a large mixing bowl, combine the raisins, currants, mixed peel, apricots, dates, and prunes. Mix well.

2. Add the breadcrumbs, flour, suet, brown sugar, cinnamon, nutmeg, ginger, and baking powder to the bowl. Stir until all the ingredients are evenly distributed.

3. In a separate bowl, whisk together the milk, eggs, orange zest, lemon zest, and the juice of the orange and lemon.

4. Pour the wet mixture into the dry mixture and stir until everything is well combined. The mixture should have a thick, sticky consistency.

5. Grease a 2-pint pudding basin and spoon the pudding mixture into it, pressing it down firmly.

6. Cover the basin with a double layer of greased parchment paper or aluminum foil, making a pleat in the center to allow for expansion. Tie the paper or foil securely with kitchen string.

7. Place the pudding basin in a large pot and fill the pot with enough boiling water to come halfway up the sides of the basin.

8. Cover the pot with a lid and steam the pudding over low heat for about 6 hours. Make sure to check the water level occasionally and top it up if needed.

9. Once the pudding is steamed, remove it from the pot and let it cool completely. You can store it in a cool, dark place for up to a month if desired.

10. When you're ready to serve the pudding, reheat it by steaming for


 Here are two dessert recipes using fruit:


1. Grilled Pineapple with Cinnamon Sugar:

Ingredients:

- 1 ripe pineapple

- 2 tablespoons of melted butter

- 2 tablespoons of brown sugar

- 1 teaspoon of ground cinnamon

- Vanilla ice cream (optional)

Instructions:

1. Preheat your grill to medium-high heat.

2. Cut off the top and bottom of the pineapple, then remove the skin and core. Slice the pineapple into rings or wedges.

3. In a small bowl, mix together the melted butter, brown sugar, and ground cinnamon.

4. Brush the pineapple slices with the cinnamon sugar mixture, making sure to coat both sides.

5. Place the pineapple slices on the preheated grill and cook for about 2-3 minutes per side, or until grill marks appear and the pineapple is slightly caramelized.

6. Remove from the grill and serve warm. You can enjoy the grilled pineapple as is or serve it with a scoop of vanilla ice cream for an extra indulgence.


2. Berry Parfait:


Ingredients:

- 2 cups of mixed berries (strawberries, blueberries, raspberries, etc.)

- 2 cups of Greek yogurt

- 1/4 cup of honey or maple syrup

- Granola or crushed nuts for topping

Instructions:

1. Wash and dry the berries, then slice any larger berries into bite-sized pieces.

2. In a bowl, mix the Greek yogurt and honey/maple syrup until well combined.

3. In serving glasses or bowls, layer the Greek yogurt mixture, followed by a layer of mixed berries. Repeat the layers until the glasses are filled.

4. Top each parfait with a sprinkle of granola or crushed nuts for added crunch.

5. Refrigerate for at least 30 minutes to allow the flavors to meld together.

6. Serve chilled and enjoy!

These recipes are simple, refreshing, and perfect for satisfying your sweet tooth with a fruity twist.

Thursday, November 9, 2023

Christmas Dinner Popular During The Depression

Here's an economical recipe for a delicious Christmas dinner for four:

Main Course:

- Roasted Chicken: Purchase a whole chicken (around 4-5 pounds) and season it with salt, pepper, and your choice of herbs. Roast it in the oven at 375°F (190°C) for about 1.5 to 2 hours, or until the internal temperature reaches 165°F (74°C).

Side Dishes:

- Mashed Potatoes: Peel and boil 4 large potatoes until tender. Drain and mash them with butter, milk, salt, and pepper to taste.

- Roasted Vegetables: Cut a variety of vegetables like carrots, Brussels sprouts, and potatoes into bite-sized pieces. Toss them with olive oil, salt, pepper, and any desired herbs. Roast in the oven at 400°F (200°C) for about 30-40 minutes, or until golden and tender.

- Green Beans: Blanch a pound of fresh green beans in boiling water for 2-3 minutes, then transfer them to an ice bath to stop the cooking process. Sauté the beans in a pan with garlic, olive oil, salt, and pepper until tender.

Gravy:

- Homemade Gravy: After roasting the chicken, use the drippings from the pan. In a saucepan, melt 2 tablespoons of butter, add 2 tablespoons of flour, and cook for a minute. Slowly whisk in 2 cups of chicken broth and the pan drippings. Simmer until thickened, and season with salt and pepper.

Dessert:

- Apple Crumble: Peel and slice 4 apples, then toss them with sugar, cinnamon, and a squeeze of lemon juice. Place the apple mixture in a baking dish. In a separate bowl, combine 1 cup of flour, 1/2 cup of brown sugar, 1/2 cup of oats, and 1/2 cup of melted butter. Sprinkle this crumble mixture over the apples. Bake at 375°F (190°C) for about 30-35 minutes, or until the top is golden brown.

Beverage:

- Mulled Apple Cider: In a large pot, combine 4 cups of apple cider, 1 cinnamon stick, 4 cloves, and a few slices of orange. Simmer over low heat for 15-20 minutes. Serve warm.

To decorate your lounge and Christmas tree, here are some simple tips:

1. Choose a color scheme: Decide on a color scheme that complements your lounge decor and personal preferences. Traditional colors like red, green, and gold are popular, but you can also go for a more modern look with silver, white, and blue, or even a unique theme like pastels or rustic tones.

2. Lounge decorations:

   - Hang garlands: Drape garlands along the staircase railing, fireplace mantel, or around door frames. You can use fresh greenery or artificial garlands with added ornaments or lights.

   - Add throw pillows and blankets: Incorporate festive-themed pillows and cozy blankets in your lounge seating area to create a warm and inviting atmosphere.

   - Display candles: Place scented or decorative candles on coffee tables or shelves to add a cozy glow. Ensure they are safely positioned away from flammable objects.

3. Christmas tree decorations:

   - Start with lights: Begin by stringing the lights on the tree, starting from the top and working your way down. Use either white or colored lights, depending on your preference.

   - Hang ornaments: Hang ornaments evenly throughout the tree, mixing different shapes, sizes, and textures. Consider using a variety of colors that match your chosen color scheme.

   - Top it off: Crown your tree with a tree topper, such as a star, angel, or a decorative bow.

4. Additional tips:

   - Use ribbons and bows: Incorporate ribbons or bows in your color scheme to add texture and visual interest. You can wrap them around the tree or use them as accents in your lounge decor.

   - Add a tree skirt: Place a tree skirt around the base of your Christmas tree to hide the stand and add a finishing touch.

   - Consider themed decorations: If you have a specific theme in mind, such as a winter wonderland or a specific movie-inspired theme, incorporate ornaments and decorations that align with that theme.

Remember, the most important thing is to have fun and let your creativity shine while decorating your lounge and Christmas tree.


Sunday, October 29, 2023

Beauty and Health Benefits of Aloe Vera


https://amzn.to/3rk5ts7

" #CommissionEarned."

A Comprehensive Guide to the Beauty and Health Benefits of Aloe Vera

Rating: ★★★★☆ (4/5)

Review:

"Beauty and Health Benefits of Aloe Vera" by Anita Hasch 

This is an informative and well-researched book that delves into the numerous advantages of incorporating aloe vera into our daily lives. With its extensive coverage of both beauty and health benefits, this book serves as a valuable resource for anyone seeking to harness the potential of this remarkable plant.

One of the book's strengths lies in its organization and structure. Anita Hasch takes a systematic approach, dividing the content into sections that cover various aspects of aloe vera's benefits. From skincare and haircare to digestive health and immune system support, each chapter provides detailed explanations and practical tips on how to utilize aloe vera effectively.

The author's writing style is clear and concise, making the information accessible to readers of all backgrounds. The book strikes a good balance between scientific explanations and practical advice, ensuring that readers can understand the underlying principles. Anita Hasch's extensive research is evident throughout the book, as she cites scientific studies and references to support her claims. This adds credibility to the information presented and instills confidence in readers looking to explore the benefits of aloe vera.

Additionally, the inclusion of personal anecdotes and testimonials from individuals who have experienced positive results from using aloe vera adds a relatable touch to the book. These stories serve as inspiration and motivation for readers to try out the suggested remedies and incorporate aloe vera into their own beauty and health routines.

In conclusion, "Beauty and Health Benefits of Aloe Vera" by Anita Hasch is a comprehensive guide that provides valuable insights into the potential of aloe vera for enhancing beauty and promoting overall well-being. With its well-researched content, practical tips, and personal anecdotes, this book is a valuable resource for anyone interested in harnessing the power of this versatile plant. Despite the lack of visual elements, the book's informative nature makes it a worthwhile read.

Sunday, October 15, 2023

Prince Harry The Duke of Sussex Audio Book, "Spare,"

    Commission received


Prince Harry, The Duke of Sussex Book: 'Spare.'

Introduction: Prince Harry, the Duke of Sussex, has recently made headlines with the release of his highly anticipated audio book, "Spare." In this deeply personal memoir, Prince Harry shares his life experiences, struggles, and triumphs, offering readers a unique glimpse into his journey of self-discovery and growth. With its honest and vulnerable narrative, "Spare" promises to be an inspiring and thought-provoking listen for audiences worldwide.

Unveiling the Story:

"Spare" delves into Prince Harry's life, exploring his childhood, his time in the military, and his public role as a member of the British royal family. However, what sets this audio book apart is its focus on Prince Harry's personal struggles with mental health, grief, and the challenges he faced growing up in the public eye. Through his candid storytelling, he aims to break down stigmas surrounding mental health and encourage open conversations about well-being.

A Journey of Self-Discovery:

Prince Harry's audio book takes listeners on a journey of self-discovery, as he reflects on his experiences and the impact they have had on his life. From his mother's tragic death to his decision to step back from royal duties, Prince Harry shares his emotions, vulnerabilities, and the lessons he has learned along the way. By sharing his own story, he hopes to inspire others to embrace their own journeys and find the courage to face their own challenges.

A Platform for Positive Change:

Beyond personal anecdotes, "Spare" also serves as a platform for Prince Harry to discuss important societal issues. He addresses topics such as racial inequality, environmental conservation, and the power of compassion. By using his platform to shed light on these pressing matters, Prince Harry aims to inspire listeners to take action and make a positive impact in their own lives and communities.

The Power of Audio:

Prince Harry's decision to release "Spare" as an audio book adds an intimate and personal touch to his storytelling. Hearing his voice and emotions firsthand creates a deeper connection between the author and the audience. This format allows listeners to fully immerse themselves in his narrative, making the experience even more impactful and relatable.

Conclusion:

Prince Harry's audio book, "Spare," offers a rare and honest glimpse into the life of a prominent figure who has faced both privilege and adversity. Through his candid storytelling, Prince Harry aims to inspire listeners to embrace their own journeys

https://amzn.to/3RXfyWQ

Commission Received as an Amazon affiliate


Wednesday, October 11, 2023

Garlic for Health


Remarkable Health Benefits of Garlic.

Introduction:

Garlic, a pungent and flavorful herb, has been used for centuries not only to enhance the taste of various dishes but also for its numerous health benefits. From boosting the immune system to reducing the risk of chronic diseases, garlic has earned its reputation as a powerful natural remedy. In this article, we will explore the remarkable health benefits of garlic and why it deserves a prominent place in your diet.

1. Immune System Booster:

Garlic is renowned for its immune-boosting properties. It contains compounds like allicin, which have antimicrobial and antiviral effects. Regular consumption of garlic can help strengthen the immune system, making it more resilient against common illnesses such as colds and flu. Additionally, garlic's antioxidant properties help reduce oxidative stress and inflammation, further supporting overall immune health.

2. Heart Health:

Garlic has long been associated with promoting heart health. Studies have shown that garlic can help lower blood pressure levels, reduce cholesterol levels, and prevent the formation of blood clots. These effects can significantly reduce the risk of heart disease and stroke. Garlic's ability to improve blood circulation and relax blood vessels contributes to its positive impact on cardiovascular health.

3. Anti-Cancer Properties:

Several studies suggest that garlic may have cancer-fighting properties. Its organosulfur compounds, including allicin, have been found to inhibit the growth of cancer cells and reduce the risk of certain types of cancer, such as stomach and colorectal cancer. Garlic's antioxidant properties also play a role in neutralizing harmful free radicals, which can damage cells and contribute to the development of cancer.

4. Anti-Inflammatory Effects:

Chronic inflammation is linked to various health conditions, including arthritis, cardiovascular disease, and certain cancers. Garlic contains sulfur compounds that possess anti-inflammatory properties, helping to reduce inflammation in the body. By incorporating garlic into your diet, you may experience a decrease in inflammation and associated symptoms.

5. Improved Digestive Health:

Garlic has been used traditionally to aid digestion. It stimulates the production of digestive enzymes, promoting better digestion and nutrient absorption. Garlic also acts as a prebiotic, nourishing the beneficial bacteria in the gut, which supports a healthy digestive system. Additionally, garlic's antimicrobial properties can help combat harmful bacteria in the digestive tract.

6. Enhanced Detoxification:

Garlic supports the body's natural detoxification processes. It contains sulfur compounds that assist in boosting the immune system and promoting overall health. These sulfur compounds, such as allicin, have been found to have antimicrobial and antioxidant properties, making garlic a powerful natural remedy for various ailments. 

Studies have shown that regular consumption of garlic can help reduce the risk of cardiovascular diseases, lower blood pressure, and improve cholesterol levels. 

Additionally, garlic has been known to have anti-inflammatory effects, which can aid in relieving symptoms of arthritis and other inflammatory conditions. With its rich nutritional profile, including vitamins C and B6, manganese, and selenium, garlic is not only a flavorful addition to meals but also a valuable ingredient for maintaining a healthy lifestyle.